How I Organized My Baking Supplies Using Cheap Dollar Store Bins (And Kept It That Way)
I’ve noticed something funny about baking. It brings out the absolute best in our intentions—and the absolute worst in our kitchen cabinets. Two years ago, my baking zone looked like a flour bomb had detonated inside a hardware store. I couldn’t find the cream of tartar. I bought three bags of chocolate chips because I kept losing them behind the stand mixer attachments. It was a disaster. Then, I spent a grand total of twelve dollars at a discount retailer, and everything changed. Here is the exact blueprint I used to overhaul my chaotic disaster of a baking station using cheap dollar store bins, without spending a fortune on aesthetic Pinterest containers.
- • The Ugly Truth About Expensive Pantry Containers
- • Step 1: The Great Purge and Categorization Routine
- • Choosing the Right Dollar Store Bins for the Job
- • Step 2: Zone Creation and Strategic Placement
- • Step 3: The Labeling Obsession That Makes It Stick
- ↳ Do I need to dump my flour and sugar directly into the dollar store bins?
- ↳ What do I do if my dollar store doesn't have matching bins?
- ↳ How do I keep flour from making a mess inside the bins?
- ↳ Is it worth upgrading to expensive containers later?
Key Takeaways & Quick Overview
AI Verified
- ✔How i organized my baking supplies using cheap dollar store bins (and kept it that way) i’ve noticed something funny about baking.
- ✔It brings out the absolute best in our intentions—and the absolute worst in our kitchen cabinets.
- ✔Two years ago, my baking zone looked like a flour bomb had detonated inside a hardware store.
- ✔I bought three bags of chocolate chips because i kept losing them behind the stand mixer attachments.
The Ugly Truth About Expensive Pantry Containers
Let’s clear the air right now. Scroll through social media, and you will see gorgeous glass jars with bamboo lids, uniformity that costs a mortgage payment, and pantry setups that belong in a museum. But here is the reality check: baking supplies are messy. Flour gets everywhere. Powdered sugar leaves clouds. If you drop a heavy glass canister on your tile floor, you are calling an ambulance or at least weeping over ruined floorboards.
I tried the high-end route once. It lasted four months before I realized the lids didn’t seal properly, the openings were too narrow for a measuring cup, and I had invested eighty dollars into plastic that scratched if I looked at it wrong. Cheap dollar store bins, specifically the semi-clear plastic ones with open tops or simple latches, offer a brutalist functionality that high-end brands just cannot touch. They are lightweight, they are easily replaceable, and if one gets crusty with molasses, you toss it in the sink and scrub it without a second thought.
Before you buy anything, though, you need to understand the golden rule of kitchen storage: form follows function. According to Better Homes & Gardens kitchen storage tips, accessibility trumps aesthetics every single time. If a container is too heavy or complicated to pull down, you simply won’t use it.
Step 1: The Great Purge and Categorization Routine
You cannot organize clutter. You can only move it around. Pull every single item out of your baking cabinet, your pantry, and that weird top shelf above the refrigerator where baking sheets go to die. Dump it all on the kitchen table.
I found baking powder from 2018. Do you know what baking powder does after four years? Absolutely nothing. It becomes expensive dust. Check your expiration dates ruthlessly. Once you are left with active, usable ingredients, group them into four distinct categories:
- Bulk Bases: All-purpose flour, bread flour, granulated sugar, brown sugar, powdered sugar.
- Leaveners and Flavorings: Baking soda, baking powder, vanilla extract, food coloring, spices used exclusively for baking.
- Inclusions and Add-ins: Chocolate chips, nuts, coconut flakes, dried fruit, sprinkles.
- Tools and Hardware: Cookie cutters, piping bags, decorating tips, pastry brushes, measuring spoons.
Now, grab a tape measure. Do not guess the dimensions of your shelves. Measure the depth, width, and vertical clearance. There is nothing more frustrating than buying twelve bins only to realize your cabinet door won’t close because the lip of the container is a quarter-inch too wide.
Choosing the Right Dollar Store Bins for the Job
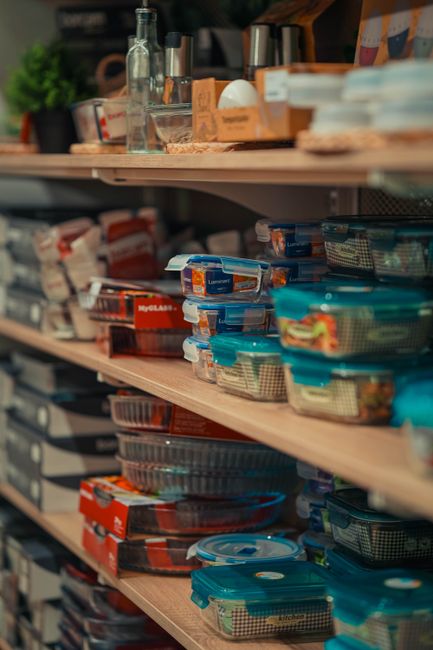
Not all dollar store plastic is created equal. Walk past the flimsy, brittle colored bins that crack if you squeeze them too hard. You want the semi-translucent, slightly flexible polypropylene bins. Why? Because you want to see what is inside without pulling the entire bin off the shelf.
Here is my exact inventory breakdown from the dollar store aisle:
- Wide rectangular shallow bins: Perfect for holding extract bottles, gel food colorings, and small spice jars so they don’t get lost in the back.
- Deep medium baskets with handles: Ideal for flour and sugar bags. The handles make it easy to slide the bin out like a drawer.
- Small modular divided trays: Essential for cupcake liners, sprinkles, and decorating tips.

Step 2: Zone Creation and Strategic Placement
Once you have your bins, layout is everything. Put the heavy items—like flour and sugar—on the lowest possible shelf. Trust me on this. Lifting a ten-pound bag of flour from a shoulder-height shelf is a great way to dust your kitchen floor with white powder and pull a latissimus muscle.
Put your most frequently used items at eye level. For me, that meant chocolate chips, vanilla, and measuring tools right in the center. Seasonal items—like Christmas cookie cutters or massive turkey roasting pans—go up top.
When loading your baking supplies into the bins, consider food safety and pest prevention. For long-term storage, keeping items sealed inside their original packaging *inside* the dollar store bins provides a double layer of defense against pantry moths. For more details on safe food handling and storage longevity, check out the FDA food storage guidelines.
Step 3: The Labeling Obsession That Makes It Stick
An organization system without labels is just a ticking time bomb. Within three weeks, someone else in your household (or you, at 9:00 PM while sleep-deprived) will shove a bag of cornstarch into the wrong bin, and the entropy begins again.
You don’t need a fancy thermal printer, though they are fun. A piece of masking tape and a Sharpie works fine. I prefer using a basic label maker. Label the front of the bin clearly. Don’t write “Baking Stuff.” Write “Sugars” or “Extracts & Spices.” Be brutally specific.
Frequently Asked Questions
Do I need to dump my flour and sugar directly into the dollar store bins?
No, and honestly, I advise against it unless the bins are specifically rated food-safe with airtight silicone gaskets. Keeping bags inside the bins is cleaner, prevents pantry pests from chewing through thin plastic, and makes it easier to check expiration dates.
What do I do if my dollar store doesn’t have matching bins?
Mix and match with a unified color palette. If you buy all white, all clear, or all gray bins, variations in shape won’t look messy. Avoid the neon pink and bright green bins unless you are organizing a kid’s craft room.
How do I keep flour from making a mess inside the bins?
Keep flour in its original paper bag, fold the top down tightly, and secure it with a large binder clip before placing it inside the plastic bin. If any flour leaks, it stays contained to the bin, which you can wipe out in five seconds.
Is it worth upgrading to expensive containers later?
Honestly? I’ve had my dollar store setup running for two years through heavy holiday baking seasons, birthday cakes, and weekly bread making. It hasn’t failed me yet. Save your money for better ingredients, like high-fat European butter and good vanilla beans.