I’ve lost count of how many times a contractor quoted me four grand to wrap some melamine around a bedroom wall and call it a “custom luxury closet.” Let’s be real: it’s just glorified particle board. When you look past the showroom lighting and the slick sales pitches, those bespoke quotes are mostly markup. I realized this a few years ago when I tore out a sagging wire rack in my master bedroom and stared at bare drywall. I didn’t want to drop a mortgage payment on custom storage, but I also refused to live out of plastic bins. So, I figured out a workaround. That cheap hack? It completely changes the geometry of your storage game. Stick with me, and I’ll walk you through how I pulled off a high-end built-in look for less than the cost of a weekend grocery run.

- • The Ugly Truth About "Custom" Closets
- • The Hack: Faking Face Frames with 1×2 MDF Boards
- • Securing to Studs and Managing Weight Distribution
- • Step-by-Step Execution Plan
- ↳ Do I need expensive tools to pull off this custom closet hack?
- ↳ What type of paint works best for this budget closet hack?
- ↳ Can this hack work for a tiny reach-in closet, or is it just for walk-ins?
- ↳ How do I handle baseboards when installing these units flush to the wall?
Key Takeaways & Quick Overview
AI Verified
- ✔I’ve lost count of how many times a contractor quoted me four grand to wrap some melamine around a bedroom wall and call it a “custom luxury closet.
- ✔” let’s be real: it’s just glorified particle board.
- ✔When you look past the showroom lighting and the slick sales pitches, those bespoke quotes are mostly markup.
- ✔I realized this a few years ago when i tore out a sagging wire rack in my master bedroom and stared at bare drywall.
The Ugly Truth About “Custom” Closets
Here is the secret the industry doesn’t want you to know: high-end closet companies use the exact same mass-produced MDF and laminate you can buy off the shelf at any big-box hardware store. They just charge you for the CNC machine cuts and the labor. According to data from the National Association of Home Builders, finish carpentry and built-ins consistently rank among the highest-inflated home modification costs. It is maddening.
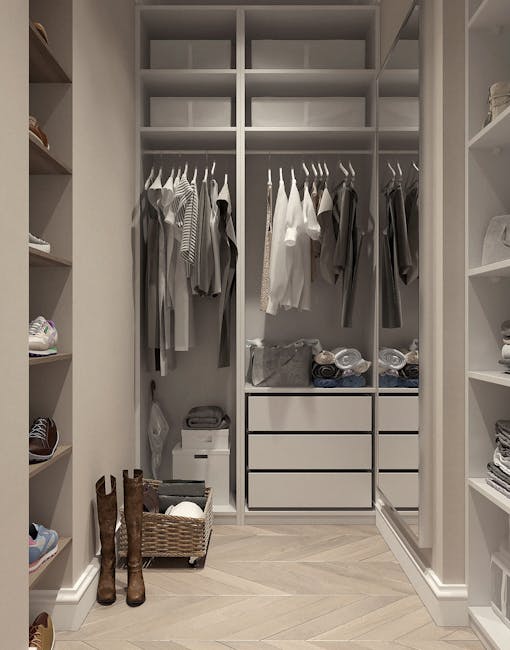
So how do we beat the system? We use flat-pack utility shelving—the cheap, white wire or laminate uprights that cost thirty bucks—and we camouflage them. We aren’t building a rocket ship here. We are creating the illusion of heavy, floor-to-ceiling architectural millwork using lightweight framing tricks, MDF trim, and a heavy dose of caulk. Trust me on this: nobody cares what’s underneath the paint once the face frame is glued and nailed down.
The Hack: Faking Face Frames with 1×2 MDF Boards
This is where the magic happens. If you buy standard budget tower units, they look cheap because they have thin, exposed edges and look like floating boxes. To fix this, you apply 1×2 MDF strips directly to the front edges of the vertical uprights and shelves. Suddenly, that 5/8-inch cheap board looks like a robust, 1.5-inch thick slab of architectural lumber.
I’ve noticed that most DIYers skip this step because they think it requires a table saw and master-level woodworking skills. It doesn’t. You can ask the folks at the home center to make your primary rips, or you can use a basic circular guide at home. Use a bit of wood glue and a brad nailer to tack those strips flush to the front. Fill the nail holes with spackle, sand it smooth, and prep for paint. Boom. Instant luxury.
Securing to Studs and Managing Weight Distribution
Looks are worthless if your wardrobe collapses onto the floor at 3:00 AM. Safety and structural integrity are non-negotiable. When anchoring your modified units, you cannot rely solely on drywall anchors. You must screw directly into the wall studs. If your stud spacing doesn’t line up with your unit’s pre-drilled holes, use a French cleat system or a horizontal ledger board screwed into at least three studs to bear the primary weight load.
Furthermore, consumer advocacy groups like Consumer Reports frequently highlight the tipping hazards of tall furniture and shelving units in residential homes. Always secure your upper anchors properly. Once the unit is anchored and your face frames are pinned in, bridge any gaps between the units and the drywall with paintable latex caulk. Paint the entire wall and the unit the exact same color. Monochromatic paint is the ultimate equalizer; it tricks the eye into seeing a single, unified built-in structure rather than separate pieces bolted together.
Step-by-Step Execution Plan
Let’s break down the actual workflow so you don’t get overwhelmed halfway through Saturday afternoon.
- Strip and Clean: Rip out the old wire shelving and patch any massive holes. Don’t stress about minor imperfections since you’ll be painting over them soon anyway.
- Assemble the Basements: Build your cheap vertical towers according to the manufacturer instructions, but leave off any flimsy backing boards. Wall visibility looks cleaner.
- Attach the Face Frames: Measure twice, cut your 1×2 MDF strips, and secure them to the front edges with wood glue and 1-inch brad nails.
- Caulk and Paint: Fill all nail holes, caulk every seam where wood meets drywall, and paint everything from wall to shelf in a satin or semi-gloss finish.
The entire project takes roughly a weekend, and the total material cost usually stays under $200 depending on the size of your space. Compare that to a $3,000 professional quote, and you’ll feel like a genius every time you pick out a shirt in the morning.
Frequently Asked Questions
Do I need expensive tools to pull off this custom closet hack?
Not at all. A basic cordless drill, a hammer, a tube of caulk, and a cheap brad nailer (or even a hammer and finishing nails) will get the job done. If you don’t own a saw, have the hardware store make your long cuts for you.
What type of paint works best for this budget closet hack?
Go with a water-based enamel or a durable acrylic latex in a satin or semi-gloss finish. These sheens resist scuffs from hangers and shoes much better than flat or matte paints, and they wipe clean easily.
Can this hack work for a tiny reach-in closet, or is it just for walk-ins?
It works even better in small reach-in closets! By maximizing vertical space and removing unnecessary side panels, you actually gain usable square footage compared to standard builder-grade wire setups.
How do I handle baseboards when installing these units flush to the wall?
You have two choices: cut out a section of your existing baseboard so the vertical tower sits completely flush against the drywall, or use wood shims and scribe molding to bridge the gap. Cutting the baseboard yields the cleanest, most professional built-in look.