I’ve tracked mud through three different apartment complexes, ruined two area rugs, and nearly thrown out my lower back trying to wrestle a fifty-pound Ficus benjamina into a new ceramic pot. Here’s the ugly truth nobody tells you when you buy that majestic, six-foot fiddle-leaf fig from the local nursery: it eventually needs a bigger home. And if you live on the fourth floor of a walk-up with zero outdoor space, a concrete balcony the size of a postage stamp, and a landlord who charges for carpet cleaning, the thought of repotting is genuinely terrifying.
Most plant care blogs assume you have a sprawling suburban backyard, a garden hose, and a designated potting bench. They live in a fantasy world. You live in reality—a place with hardwood floors, a tiny bathtub, and tight corners. But you do not need to abandon your urban jungle ambitions just because you lack a yard. I’ve figured out the exact containment strategies, hacks, and workflow to up-pot heavy specimens indoors without turning your living room into a literal disaster zone. Trust me on this: once you master the indoor setup, you’ll never dread root-bound season again.
- • The Shower Method: Staging Your Indoor Workspace
- • The Tarp and Tilt Extraction Technique
- • Navigating Messy Soil Transfers in Tight Spaces
- • Post-Repotting Transport and Recovery
- ↳ Can I repot a large plant without taking it to the bathroom?
- ↳ Never drag a heavy ceramic pot directly on carpet or hardwood. Place a heavy-duty furniture slider, a folded yoga mat, or a thick wool blanket underneath the base. You can easily pull the makeshift sled without damaging your floors or straining your muscles.
<h3 id="what-do-i-do-with-all-the-old-root-ball-soil?
Key Takeaways & Quick Overview
AI Verified
- ✔I’ve tracked mud through three different apartment complexes, ruined two area rugs, and nearly thrown out my lower back trying to wrestle a fifty-pound ficus benjamina into a new ceramic pot.
- ✔Here’s the ugly truth nobody tells you when you buy that majestic, six-foot fiddle-leaf fig from the local nursery: it eventually needs a bigger home.
- ✔And if you live on the fourth floor of a walk-up with zero outdoor space, a concrete balcony the size of a postage stamp, and a landlord who charges for carpet cleaning, the thought of repotting is genuinely terrifying.
- ✔Most plant care blogs assume you have a sprawling suburban backyard, a garden hose, and a designated potting bench.
The Shower Method: Staging Your Indoor Workspace
Forget the kitchen counter. Forget the dining table. Your workspace for a heavy plant is the bathroom—specifically, the tub or the step-in shower stall. Why? Because water and loose soil are inevitable, and porcelain is the easiest surface in the world to clean.
Before you even touch the plant, lay down a heavy-duty plastic drop cloth or a couple of large contractor garbage bags cut open along the seams. Cover the entire floor of the bathroom and extend it out into the hallway if your plant has a massive canopy. This catches the cascading soil chunks that always manage to bounce off the pot. According to the University of Florida Extension potting guide, root health depends heavily on fresh, well-aerated soil mixes, which means you’ll be dealing with a lot of loose, dry perlite and peat that loves to stick to static-prone carpets.
Bring your tools into the bathroom first:
- Your new pot (pre-washed and dried)
- A fresh bag of soil tailored to your specific plant’s drainage needs (check the Royal Horticultural Society soil guide if you are unsure about composition)
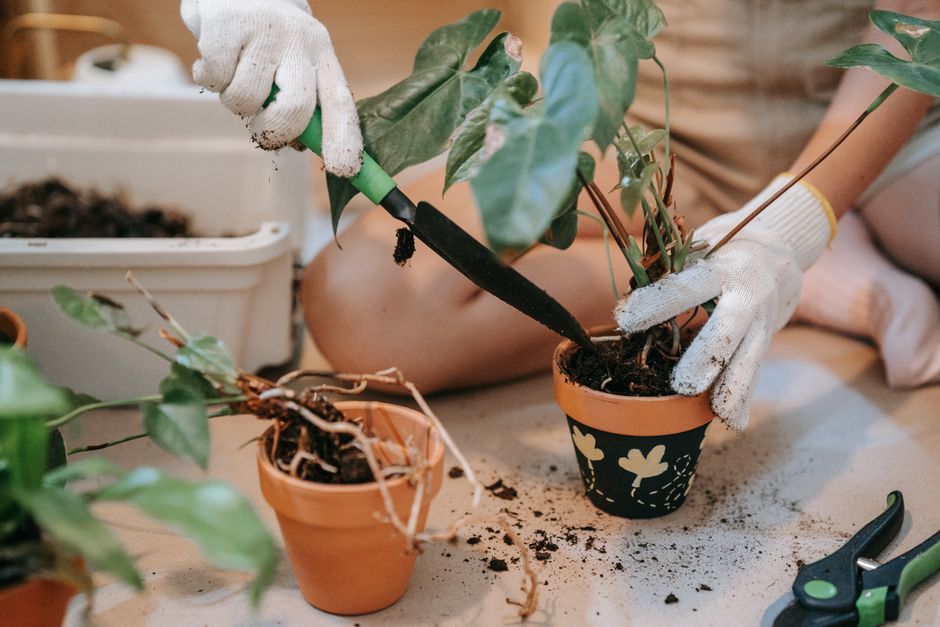
- A blunt-nosed trowel
- Pruning shears for root maintenance
- A kneeling pad because bathroom tiles are merciless on your knees
Now, slide or carefully carry your heavy green friend into the bathroom. If the pot is too wide for the door frame, well, we need to talk about sliding it on a flattened cardboard box instead.

The Tarp and Tilt Extraction Technique
Here is where most people fail and end up ripping stems off their favorite green giants. You cannot lift a seventy-pound root ball straight up out of a narrow-rimmed ceramic container. Physics is not on your side.
Instead, use the tilt-and-roll method. Lay the plant down on its side directly onto your bathroom tarp. Yes, some soil will spill out—that’s what the tarp is for. Once it’s horizontal, gently tap the sides of the plastic or nursery pot with the rubber handle of your trowel to break the vacuum seal between the roots and the container wall. If it’s in a heavy ceramic pot that cannot be squeezed, slide a long, dull butter knife or a hori-hori knife around the inner perimeter to loosen the edge-bound roots.
Rotate the pot as you pull. Do not yank the trunk. Pulling a tree trunk to extract it from a pot is a fast track to snapping the root flare. Once the pot slides off, keep the plant horizontal on the tarp while you gently tease apart the outer root circle. If the roots are tightly girdled, use your fingers to loosen them so they don’t continue to grow in a death spiral. Prune away any dead, mushy, or rotting sections right there over the tarp.
Navigating Messy Soil Transfers in Tight Spaces
Now comes the part where indoor plant parents usually panic: adding the new soil without burying half of it in the bathtub drain.
Slide your new, larger pot into position on the tarp. Add a base layer of fresh potting mix—roughly two to three inches, depending on how deep your root ball is. Remember to factor in the height of the pot’s rim; you want about an inch of clearance from the top so water doesn’t spill over every time you irrigate. Center the plant. Hold the trunk steady with one hand while you scoop soil into the gaps with the other.
Don’t just dump the soil in random clumps. Use your fingers to tamp it down gently as you go to eliminate giant air pockets around the roots. If you leave massive air pockets, the roots will dry out and die. Once the pot is filled to the appropriate level, sweep the excess soil gathered on your tarp back into the bag using your dustpan.
Post-Repotting Transport and Recovery
You’re done, but the job isn’t finished. Your plant has just undergone major surgery. It’s stressed, its roots are pruned, and it’s sitting in a heavy, wet (or freshly watered) container.
Before moving it back to its display spot, give it a thorough watering right there in the shower stall. Let the water run through the drainage holes until it runs completely clear. This settles the new soil mix and hydrates the shock-battered roots. Let it drain completely for at least an hour. Do not try to move a soaking wet, heavy ceramic pot immediately after watering—the added water weight will break your back.
Once it stops dripping, slide the pot onto a furniture mover or a thick felt blanket. Pull the blanket across your hardwood floors to glide the heavy container back to its permanent corner without scratching your floorboards or throwing your spine out of alignment.
Frequently Asked Questions
Can I repot a large plant without taking it to the bathroom?
Yes, but you must create a dedicated workspace in a room with hard flooring, like a kitchen or a tiled entryway. Lay down a massive plastic tarp or a child’s inflatable plastic pool to act as a physical barrier for escaping soil and water.
Bag it up in old grocery bags and toss it in your regular household trash, or add it to your indoor worm bin if you vermicompost. Do not wash heavy potting soil down your apartment plumbing—it will quickly clog your P-trap and cause an expensive maintenance call.